Disclosure: This article contains affiliate links. If you purchase through them, HarvestSense.ai earns a small commission at no extra cost to you. I only recommend products I’ve researched thoroughly. Full disclosure policy here.
📋 In This Guide
- What High-Rise Food Growing Actually Looks Like in 2026
- Step 1: Assess Your Growing Space
- Step 2: Choose the Right Growing System
- Step 3: Know What to Grow (and in What Order)
- Step 4: Solve the Light Problem
- Balcony Weight Safety Guide
- Your 90-Day Roadmap
- Real Talk: What to Actually Expect
- Where to Go From Here
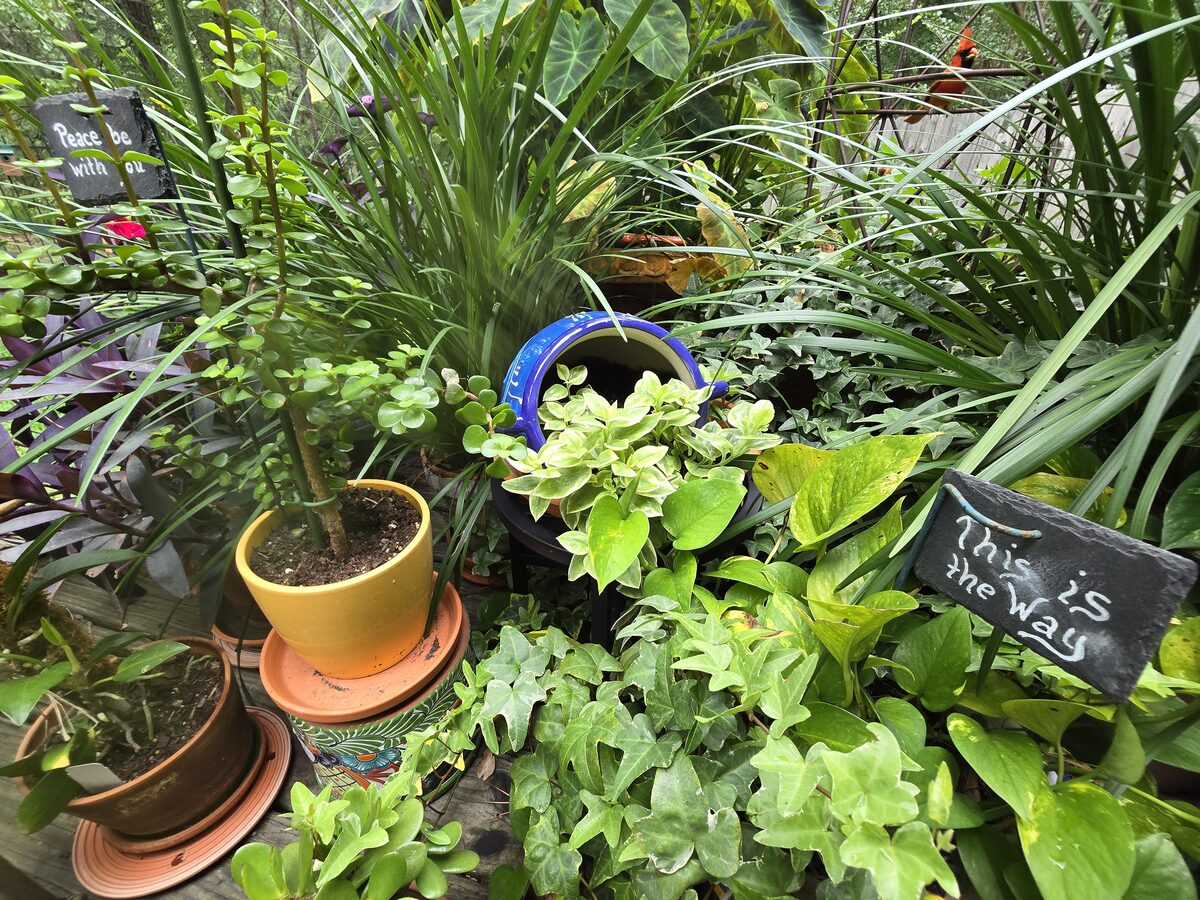
In 2026, the concept of the “apartment garden” has fundamentally evolved. We have moved past the era of the sad windowsill succulent and into the age of Urban Autonomy. Supply chains are becoming more regionalized, and AI-integrated growing technology has hit a genuine peak of accessibility — meaning high-rise residents are no longer just consumers. They can be producers. This guide covers the systems, the science, and the practical strategies to turn a few square feet of your living space into a resilient food production engine.

For eight years I lived in an RV north of Houston. 105°F summers, minimal shade, a footprint roughly the size of a studio apartment. Nothing kills a plant faster than Texas heat with nowhere to hide — and nothing teaches you container gardening faster than losing a dozen plants to it.
What that experience built was a constraints-first mindset. Stop comparing your balcony to a half-acre homestead. Start asking: what actually works here? Once that shift happens, growing real food in a high-rise stops feeling impossible and starts feeling like a solvable puzzle.
This guide is built around that question — specifically for people growing food in apartments, condos, and high-rises. Not aspirational Pinterest content. Real information about what you can actually grow, what systems are worth buying, and how to build a setup that produces food week after week starting from scratch.
What High-Rise Food Growing Actually Looks Like in 2026
The biggest shift in apartment food growing over the last few years isn’t a new crop or a new technique. It’s the technology. Vertical hydroponic towers have gotten genuinely good. Systems like the Lettuce Grow Nook and the Gardyn Studio use 95% less water than soil gardening and let you grow 16–30 plants in under two square feet of floor space. Countertop pod systems have made year-round herb growing nearly foolproof. And LED grow light technology has gotten efficient enough that supplementing natural light no longer costs a fortune in electricity.
The result: a serious apartment food garden is now accessible and affordable in a way it genuinely wasn’t five years ago.
What you can realistically produce
- Fresh herbs year-round — basil, cilantro, mint, parsley, thyme
- Salad greens on a continuous cut-and-come-again harvest cycle
- Cherry tomatoes and compact peppers with adequate light
- Microgreens ready to harvest in 10–14 days
- Dwarf cucumbers and bush beans on a balcony in summer
What to keep realistic expectations about
- Root vegetables (carrots, beets, parsnips) need container depth that most setups can’t provide
- High-calorie staple crops (potatoes, squash, corn) need more space than most apartments allow
- You won’t replace your grocery bill — but you’ll meaningfully, measurably offset it
For context on value: a healthy basil plant in a hydroponic system gives you harvests for months from a $4 seed pod. A bunch of fresh basil at the grocery store costs $3–5 and wilts in a week. Add cilantro, parsley, mint, and thyme to that setup and you’re offsetting $40–60/month in produce spending from herbs alone — before you grow a single vegetable.
Step 1: Assess Your Growing Space Honestly
Before buying anything, spend a few days actually observing your space. This single step prevents the most common and expensive apartment gardening mistake: buying equipment suited for conditions you don’t have.
The light audit
Stand at your windows at different times of day — morning, midday, and late afternoon. Note which direction they face and count the hours of direct sun each spot receives. This determines more about what you can grow, and what equipment you need, than any other factor.
- South-facing windows: The jackpot. 6+ hours of direct sun. You can grow herbs, greens, and many fruiting crops with good natural light alone.
- East or west-facing: 3–5 hours of direct sun. Herbs, lettuce, spinach, and kale do fine. Tomatoes and peppers will need supplemental grow lights to produce well.
- North-facing: Minimal direct sun. Grow lights are not optional here — they’re necessary for any food production beyond low-light herbs like mint and chives.
If you have a balcony, also check for shading from the floor above or adjacent structures. A south-facing balcony can still receive only 3–4 hours of direct sun if there’s a significant overhang. What matters is actual measured light, not compass direction alone.
The balcony assessment
A balcony opens up significantly more growing potential, but two things need to be understood before you load it with containers: weight limits and wind exposure.
Most apartment balconies are engineered for a live load of 40–60 lbs per square foot. On a standard 6×10 ft balcony, the theoretical maximum is 2,400–3,600 lbs total — but that budget is shared between furniture, people, and plants. A practical working guideline: keep your plant and container load under 15 lbs per square foot, and distribute weight toward the building wall rather than the outer railing where structural support is greatest.
Wind exposure is the other variable that catches high-floor gardeners off guard. Above the 10th floor, wind can shred leafy plants and dry containers out in hours. If you’re in a significantly exposed position, factor this into crop and container choices — heavier, sturdier planters near wind-protected corners outperform lightweight setups in open exposure.
Indoor-only growing spaces: No balcony? No problem. Countertop pod systems near a bright window, vertical towers in a corner with a grow light, and dedicated grow shelves with full-spectrum LEDs are all proven setups that require zero outdoor access. The limitation is light — and as you’ll see below, that’s a solvable problem.
Step 2: Choose the Right Growing System
This is where most people get overwhelmed by options. Here’s a practical breakdown of the main categories, what each is genuinely best for, and what to skip for apartment growers.
Vertical Hydroponic Tower Systems
Best for: continuous leafy greens and herbs, maximizing production in minimal floor space, serious apartment growers who want the most output per square foot.
Hydroponic towers circulate water and nutrients past plant roots without soil. Plants grow faster — often 2x compared to soil-grown equivalents — use dramatically less water (up to 95% less), and the vertical format stacks 16–30 growing sites into 1.5–2 square feet of footprint.
The leading options in this category right now:
- Lettuce Grow Nook: 20 plant sites, 2 square feet of floor space. The apartment-optimized version of the popular Farmstand. Made from ocean-bound recycled plastic. Excellent for herbs and greens, and one of the most reliable systems available.
- Gardyn Studio: 16 pods, approximately 1.4 square feet. Has an AI-powered app that monitors plant health, tracks harvest schedules, and sends care reminders. The most plug-and-play option in this category — genuinely designed for people who want great results without becoming hydroponic experts. The AI layer does real work: Predictive Nutrient Dosing detects shifts in nitrogen and pH before visible symptoms appear; Adaptive Spectral Lighting adjusts the light recipe (more blue spectrum for vegetative growth, more red for fruiting) based on each plant’s life stage; and Vacation Mode throttles growth rates and water consumption automatically when you’re away, keeping plants alive without intervention.
- Rise Gardens: Modular design means you start with one level and add more as your confidence grows. Better for growers who want to scale incrementally rather than committing to a full tower upfront.
We’re building a hands-on comparison of vertical hydroponic towers — Vertical Hydroponic Towers for Apartments: A Hands-On Comparison — which goes deeper on specs, true costs, and which system suits which type of grower.
A note on aeroponics
For growers with zero available floor space, high-pressure aeroponics is worth knowing about. Unlike NFT hydroponics (which circulates a water film past roots), aeroponics mists roots directly with a fine nutrient spray — producing growth rates faster than traditional hydroponics at the cost of more technical management. These systems require consistent pump pressure and clean nozzles to prevent blockages, but represent the performance ceiling of space-efficient indoor food production. They’re best suited to experienced growers who have already mastered a hydroponic setup and want to push further.
Countertop Pod Systems
Best for: herb growers, complete beginners, anyone who wants reliable results without much management overhead.
The AeroGarden line — especially the Bounty (9 pods) and Farm models — is the most proven in this category. You insert pre-seeded pods, add liquid nutrients to the reservoir, and the built-in light system manages everything automatically. Germination rates are excellent and the learning curve is genuinely shallow.
Click & Grow is a solid alternative with a more minimal aesthetic and a subscription pod model. Both systems work well; the choice mostly comes down to how much counter space you have and whether you want to use your own seeds (AeroGarden is more flexible here) or prefer the convenience of pre-seeded pods.
The honest caveat: pod costs add up over time. If you plan to grow continuously long-term, vertical tower systems become more cost-efficient. Countertop systems are best for people who want to start simply and learn before committing to a larger setup.
Fabric Grow Bags for Balcony Growing
Best for: tomatoes, peppers, cucumbers — any fruiting crop on a sunny balcony. The single best value in container gardening for balcony growers.
Fabric grow bags solve two of the biggest problems with traditional containers: weight and root health. A 10-gallon fabric bag weighs under 1 lb empty and uses lighter potting mix than hard-sided pots of the same volume — coming in at 25–40 lbs when fully watered versus 80–100 lbs for a comparable ceramic pot. On a weight-limited balcony, this difference is significant.
The breathable fabric also prevents root circling (roots air-prune at the wall rather than wrapping), promotes drainage, and reduces overwatering — one of the most common failure modes for new container gardeners. Plants in fabric bags frequently outperform those in hard containers of identical size.
Sizing guide: herbs do well in 1–3 gallon bags. Peppers need a minimum of 3–5 gallons. Tomatoes need 5 gallons at minimum — 10 gallons preferred for indeterminate varieties that produce all season.

Step 3: Know What to Grow (and in What Order)
The strategic framework: The Big Three
Food security in a high-rise isn’t about replacing your grocery bill — it’s about strategically growing the highest-density nutrients most susceptible to price volatility. In 2026, that points to three specific crop categories:
- Micro-Leafy Greens — your primary vitamin and antioxidant source. Lettuce, spinach, arugula, kale, and microgreens deliver more nutrition per square foot than almost any other crop you can grow indoors.
- High-Brix Fruiting Crops — dwarf tomatoes and compact peppers. “Brix” measures sugar and nutrient density; home-grown, vine-ripened fruit consistently outperforms commercial produce on this metric, and these are the crops most affected by grocery price swings.
- Functional Herbs — basil, mint, thyme, and oregano have documented anti-inflammatory and antimicrobial properties beyond their culinary value. They’re also the highest-ROI crops in any apartment setup: $4 in seed pods returns months of harvests worth $60–80 at retail.
Use The Big Three as your strategic shopping list. Build your setup around these categories first, then expand based on what works in your specific space.

Start with herbs — always
Before growing anything else, grow herbs. The return on investment is unmatched anywhere in apartment food gardening. A single healthy basil plant in a hydroponic system provides harvests for months from a $4 seed pod. Store-bought fresh basil costs $3–5 per bunch and wilts within days. Add cilantro, mint, parsley, thyme, and oregano to that setup and you’ve already offset your system cost within a single growing season.
Herbs that thrive in apartment conditions and deliver the most value:
- Basil: Loves warmth, hates cold drafts. Keep away from air conditioning vents. Pinch flowers off as they appear to extend the harvest window by weeks.
- Thai Basil: More heat-tolerant than sweet basil and significantly slower to bolt — a major advantage in warm apartments. Rich in antioxidants, anti-inflammatory compounds (particularly eugenol), and essential oils that have been used medicinally across Southeast Asia for centuries. The distinctive anise-clove flavor is irreplaceable in Thai curries, Vietnamese pho, and stir-fries, and it holds up to heat far better than Italian basil does.
- Mint: Grows aggressively — give it its own dedicated container or it will crowd out everything else.
- Cilantro: Bolts quickly in heat. In warm apartments, succession-plant a new pod every 3 weeks to maintain continuous supply.
- Parsley, thyme, oregano, chives: Lower maintenance, very reliable, and highly useful in the kitchen year-round.
The salad tier: your daily harvest crops
Lettuce, spinach, arugula, kale, and Swiss chard are the ideal crops for hydroponic towers and pod systems. They’re fast (30–45 days to first harvest from transplant), shallow-rooted (work in almost any container depth), and harvested using a cut-and-come-again method — you take outer leaves repeatedly rather than pulling the whole plant, extending each planting’s productive life by weeks.
A 16–20 pod vertical hydroponic tower at full production can realistically yield 2–4 oz of fresh greens daily. That’s a side salad every day or two, consistently, from a system roughly the footprint of a floor lamp.
Microgreens: the fastest path to your first harvest
If you want to grow food and see results inside two weeks, microgreens are the answer. Sunflower shoots, pea shoots, radish, and broccoli microgreens germinate in 2–3 days and are ready to harvest in 10–14. No special equipment required: a shallow 10×20 inch tray, a growing medium (coconut coir works excellently), seeds, and a basic light source.
A single tray produces 4–8 oz of dense, nutrition-packed greens per cycle. Running 2–3 trays in staggered rotation gives you a continuous harvest with a total investment under $50 in equipment and seeds. For first-time growers who need a confidence win before investing in a tower system, microgreens are the perfect starting point.
The intermediate tier: fruiting crops
Cherry tomatoes, compact peppers, and dwarf cucumbers are absolutely achievable in apartment conditions — but they require more: 6+ hours of direct light (or supplemental grow lights), 5–10 gallon containers, and more attentive watering and feeding than leafy greens.
The payoff is real. A single indeterminate cherry tomato variety in a 10-gallon fabric bag on a sunny south-facing balcony can produce several pounds of fruit across a full season. But don’t start here on your first grow. Build your fundamentals with herbs and greens first — understand your light situation and your watering rhythm — then graduate to fruiting crops in your second season.

Step 4: Solve the Light Problem
Natural light is always the first choice. It’s free, it’s the full spectrum plants evolved under, and it doesn’t require electricity or equipment. But many apartments — especially in dense urban buildings — simply don’t have adequate natural light for serious food production.
When natural light is enough
If you have south-facing windows or a south-facing balcony with 6+ hours of direct sun, you can grow herbs, greens, and even some fruiting crops without any supplemental lighting. East and west-facing exposures with 4–5 hours of direct sun are sufficient for herbs and salad greens. These are the situations where you can skip grow lights entirely, at least for your first crops.
When you need grow lights
North-facing apartments, units with significant shading from adjacent buildings, and anyone wanting to grow fruiting crops without adequate outdoor exposure all need supplemental lighting. The good news: modern full-spectrum LED grow lights have gotten dramatically better and more affordable.
What to look for when choosing a grow light:
- Full-spectrum LED — not the old red/blue LED bars (which are largely obsolete). Modern white-spectrum LEDs produce better plant growth and are far more pleasant to live with.
- Appropriate output for your space — a 45–65W LED bar handles a countertop or single shelf. A 100–200W panel covers a 2×4 ft dedicated growing area effectively.
- Built-in or compatible timer — most food crops need 14–16 hours of light per day under artificial conditions.
- PPFD rating — the measure of usable light reaching your plants. Leafy greens need 200–400 μmol/m²/s at canopy level. Fruiting crops need 400–600+.
Reliable brands at reasonable price points: Mars Hydro and Spider Farmer make excellent panels in the $60–150 range. Barrina bar lights are a solid budget option for single shelves and countertop setups.
The Balcony Weight Safety Guide
This section is worth reading carefully even if you think your balcony is “fine.” Structural failures from overloaded balconies happen, and the weight of a fully watered garden setup surprises nearly every first-time balcony gardener who actually does the math.
Understanding your weight budget
Most modern residential balconies are designed for a live load of 40–60 lbs per square foot. That sounds generous until you calculate what a single saturated container actually weighs. A 10-gallon ceramic pot filled with wet potting soil weighs 80–100 lbs. The same 10-gallon volume in a fabric grow bag with lightweight potting mix weighs 25–40 lbs when wet — a difference of 50–60 lbs per container.
Multiply that across six to ten containers on a 6×10 ft balcony and you can see how quickly you can approach or exceed a safe load.
The practical rules for balcony food gardens
- Place heavy containers against the building wall, not along the outer railing. Load-bearing capacity is greatest nearest the building structure.
- Use lightweight containers — fabric grow bags, fiberglass, or resin planters over ceramic, terracotta, or concrete.
- Use a lightweight growing mix — a blend of quality potting soil, perlite, and coconut coir weighs 30–40% less than standard potting mix when saturated.
- Keep your total plant load under 15 lbs per square foot as a working limit, with furniture and people sharing the same budget.
- If you’re above the 15th floor, or in an older building, get explicit confirmation from building management before establishing a significant balcony garden setup.
We cover this topic in more detail in our dedicated guide: Apartment Balcony Weight Limits: Your Safe Container Garden Guide (2026) — including a simple calculation worksheet for your specific setup.
Your 90-Day Apartment Food Garden Roadmap
The most common reason apartment gardens fail isn’t the system or the crops — it’s trying to build everything at once before understanding your specific space. Spend 90 days building deliberately and you’ll have a running, productive setup that you actually maintain.
Month 1: The herb foundation
Pick one system — a countertop pod unit or a small vertical tower — and grow herbs exclusively. Basil, mint, parsley, and cilantro. Learn how your apartment handles light across different times of day and season. Get a feel for your watering and nutrient rhythm. Notice what grows fastest in your conditions.
Don’t buy anything else yet. The goal of Month 1 is to understand your space, not to maximize production.
Month 2: Add the salad tier
Once your herbs are established and you’re harvesting consistently, add a salad green growing layer. This could be additional pods in your existing system, a second tray running microgreens, or a dedicated grow shelf with a simple LED bar for lettuce and spinach.
By the end of Month 2 you should be offsetting meaningful grocery spending. Fresh herbs plus regular salad green harvests is already a productive, self-sustaining system.
To maintain truly continuous harvests, adopt what experienced apartment growers call the “Bento Box” approach to succession planting: start fresh seeds every Sunday in a small nursery tray, so as one plant slot is harvested out, the next seedling is already ready to take its place. This weekly rhythm eliminates the gap between harvests that most beginners experience — the frustrating two or three weeks of waiting after clearing a tower before the next round comes in.

Month 3: Evaluate and scale intentionally
What worked well? What did you actually harvest and use? What do you wish you had more of? Now is the time to make considered investments based on real data from your space — adding balcony containers for fruiting crops in summer, upgrading your lighting with a quality grow panel, or adding a second tower to increase production.
Every apartment is different. The growers who build lasting, productive setups are the ones who let their specific conditions guide their decisions rather than buying based on what looked impressive in someone else’s setup.
Real Talk: What to Actually Expect
Growing food in an apartment is genuinely rewarding — and it isn’t a replacement for buying groceries. Going in with clear expectations is the difference between a setup you maintain for years and one that becomes a neglected corner of dead plants and half-used nutrient bottles.
The honest numbers
A well-maintained herb system plus a tower growing salad greens will realistically offset $50–80/month in grocery spending once fully established — primarily from herbs and fresh greens. Against a combined system cost of $300–600 depending on what you buy, the payback period is 6–12 months.
That’s a legitimate return, but it’s not instant. If you’re optimizing purely for financial return, start with herbs — the ROI is faster and the system cost is lower. If you want the full experience of growing diverse food, budget accordingly and enjoy the process.
What experienced growers don’t stop talking about
The thing apartment growers mention most isn’t the money. It’s the quality difference. A tomato picked ripe from your own plant bears almost no resemblance to what you find in a grocery store in January. Fresh-cut basil the moment before you use it is categorically different from the plastic clamshell version that’s been in a distribution center for four days.
That qualitative difference — not the financial return — is what keeps most serious apartment growers going year after year. It’s also a hard thing to explain until you’ve experienced it yourself.
The maintenance reality
A hydroponic tower needs checking every 1–2 days: water level, pH, nutrients. Once you’re in a rhythm this takes 5–10 minutes. If you travel, you need a plan — either a system with a large enough reservoir to handle several days unattended (the Gardyn Studio’s AI monitoring helps flag issues remotely), or someone you trust to check on it.
Container balcony gardens in summer need daily watering — sometimes twice a day in very hot, dry conditions. This is the reality of growing in small-volume containers where moisture doesn’t persist the way it does in ground soil. Self-watering planters with reservoirs reduce but don’t eliminate this commitment.
Where to Go From Here
The best starting point for most apartment growers is a countertop pod system or a compact tower for herbs, plus a pack of microgreen seeds running in parallel. Herbs give you consistent, high-value harvests relatively quickly. Microgreens give you fast wins while your main system establishes. From there, you build on what actually works in your space.
The articles below go deeper on the specific decisions you’ll face as you scale your setup:
- Vertical Hydroponic Towers for Apartments: A Hands-On Comparison — a detailed look at the Lettuce Grow, Gardyn, and Rise Gardens systems side by side
- Best Grow Lights for Apartments: Good/Better/Best Guide (2026) — honest picks from $32 to $299 for herb shelves, hydroponic towers, and serious indoor gardens
- Apartment Balcony Weight Limits: Your Safe Container Garden Guide (2026) — how to calculate your balcony’s load capacity, choose featherlight containers, and grow safely at any height
- Vacation Planning for Indoor Growers: Keep Your Apartment Garden Alive While You’re Away (2026) — Good/Better/Best solutions for keeping every plant thriving, from a long weekend to a two-week trip
Have a question about your specific setup? Use the contact form — I read every message and try to respond to every genuine question about urban growing.